
Main Task : Object Detect, Attach Sticker, Image composition
Main Library : OpenCV, Numpy, dlib
모든 코드와 사진 파일은 깃허브에 있습니다
GitHub - dlfrnaos19/rock_scissors_paper_classifier: task 1
task 1. Contribute to dlfrnaos19/rock_scissors_paper_classifier development by creating an account on GitHub.
github.com
이미지를 사용해야하니 이미지부터 불러와야 합니다
Image Load
face_path = '/content/20220111_105327.jpg'
face_origin = cv2.imread(face_path)
face_copy = face_origin.copy() # save origin pic
plt.imshow(face_copy)
plt.show()
제 얼굴이 아바타가 된 것 마냥 나오네요 무슨일인가해서 찾아보니 일반적인 라이브러리들은
RGB순으로 이미지를 로드하는데 OpenCV는 BGR순으로 이미지를 읽는다고 합니다
다행히도 이걸 바꿔주는 기능은 이미 구현이 되어있습니다
face_rgb = cv2.cvtColor(face_copy, cv2.COLOR_BGR2RGB)
plt.imshow(face_rgb)
plt.show()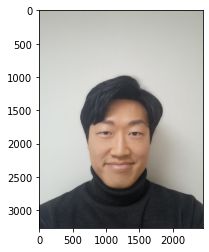
이미지를 읽었으니 본격적으로 얼굴을 인식할 시간입니다
Face Detection with dlib
dlib은 HOG(Histogram of Oriented Gradients)와 SVM(Support Vector Machine)을
주요 알고리즘으로 사용해서 얼굴을 인식합니다

CNN의 경우 MaxPooling을 통해 이미지의 특성을 줄여가는 반면 dlib의 경우
Image Pyramids를 적용해서 특성을 더욱 깊이 들어갑니다 이를 Upsampling이라고 합니다
Image Pyramids — gramman 0.1 documentation
Theory 일반적으로는 고정된 이미지 사이즈를 작업을 하지만, 때때로 동일한 이미지에 대해서 다양한 사이즈를 가지고 작업을 해야 하는 경우가 있습니다. 만일, 이미지에서 얼굴을 찾을 경우에
opencv-python.readthedocs.io
dlib의 디텍팅하는 객체를 호출 합니다
# call detector
detector = dlib.get_frontal_face_detector()
# recognise face with rectangle
dlib_rects = detector(face_rgb,1) # (image, num of image pyramid)
dlib_rects
이미지를 넣고 나면 이미지안에 얼굴을 인식한 직사각형의 좌표가 반환됩니다
dlib_rects = detector(face_rgb,1) # (image, num of image pyramid)
dlib_rects
#rectangles[[(723, 1576) (1682, 2534)]] location of rectangle in image
해당 객체가 가지고 있는 좌표를 cv2.rectangle메서드에 입력하고 다시 이미지를 띄워보면
# dlib.rectangle has left,top,right,bottom,height,width are included
for dlib_rect in dlib_rects:
    l = dlib_rect.left()
    t = dlib_rect.top()
    r = dlib_rect.right()
    b = dlib_rect.bottom()

    cv2.rectangle(face_copy, (l,t),(r,b),(0,255,0),2, lineType=cv2.LINE_AA)

img_show_rgb = cv2.cvtColor(face_copy, cv2.COLOR_BGR2RGB)
plt.imshow(img_show_rgb)
plt.show()
인식한 얼굴에 직사각형이 생긴 것을 볼 수 있습니다
Face Landmark
dlib의 랜드마크는 다음과 같은 순서로 얼굴을 인식합니다

여기에 사용할 모델은 pretrained model을 불러올 예정입니다
관련 논문(CVPR (Computer Vision and Pattern Recognition) One Millisecond Face Alignment with an Ensemble of Regression Trees)
# colab 환경에서는 !를 붙여야 bash shell 명령어를 사용 가능합니다
!wget http://dlib.net/files/shape_predictor_68_face_landmarks.dat.bz2
!bzip2 -d /content/shape_predictor_68_face_landmarks.dat.bz2
다운로드하고 압축을 푼 모델을 로드합니다
model_path = '/content/shape_predictor_68_face_landmarks.dat'
landmark_predictor = dlib.shape_predictor(model_path)
정상적으로 찍혔다면 위 그림에 나온 점의 갯수 처럼 68개가 나오게 됩니다
list_landmarks = []
# find all face landmark explained the paper above
for dlib_rect in dlib_rects:
    points = landmark_predictor(face_rgb, dlib_rect)
    # face landmark location
    list_points = list(map(lambda p: (p.x, p.y), points.parts()))
    list_landmarks.append(list_points)

print(len(list_landmarks[0]))
# 68
cv.circle 메서드를 통해서 얼굴의 포인트마다 점을 찍어줍니다
for landmark in list_landmarks:
    for point in landmark:
        cv2.circle(face_copy, point, 2, (0, 255, 255), -1)

img_show_rgb = cv2.cvtColor(face_copy, cv2.COLOR_BGR2RGB)
plt.imshow(img_show_rgb)
plt.show()
이상합니다 분명 점이 생겨야 정상인데 뜨질 않습니다
첫 의심은 랜드마크 값이 없는건가 하고 살펴봅니다
list_landmarks[0][:10]
# [(727, 1822),
 (728, 1960),
 (740, 2097),
 (761, 2231),
 (800, 2360),
 (872, 2474),
 (955, 2576),
 (1063, 2655),
 (1198, 2674),
 (1334, 2656)]
분명히 수치들은 들어가 있습니다..
여기에서 내가 예제 환경과 무엇이 다른지 곰곰히 생각해봤더니
1. 내 셀카를 직접 사용했고, 파일의 확장자가 png가 아닌 jpg여서 생기는 문제가 아닐까...
# 다른 png 사진으로 도전한다
helper_path = '/content/pngwing.com.png'
helper_origin = cv2.imread(helper_path)
helper_copy = helper_origin.copy() # save origin pic
helper_rgb = cv2.cvtColor(helper_copy, cv2.COLOR_BGR2RGB)
plt.imshow(helper_rgb)
plt.show()
급하게 디버깅을 도와주실 헬퍼로 수지씨를 모셨습니다
helper_landmarks = []
# find all face landmark explained the paper above
for dlib_rect in dlib_rects:
    points = landmark_predictor(helper_rgb, dlib_rect)
    # face landmark location
    list_points = list(map(lambda p: (p.x, p.y), points.parts()))
    helper_landmarks.append(list_points)

print(len(helper_landmarks[0]))

for landmark in helper_landmarks:
    for point in landmark:
        cv2.circle(helper_copy, point, 2, (0, 255, 255), -1)

img_show_rgb = cv2.cvtColor(helper_copy, cv2.COLOR_BGR2RGB)
plt.imshow(img_show_rgb)
plt.show()
전혀 동작하지 않았다 헛다리 짚은게 확실.
이 과정에서 점을 찍는 함수에 대해서 좀 더 깊이 파보고 싶었고
cv2 객체가 가지고 있는 이미지를 들여다보고 싶었습니다
cv2.imshow()
에러라는 것은 프로그래밍 하는데 걸림돌이긴 하지만 위의 경우는 에러 메세지도 뜨지 않는 에러 상황이었는데
다행스럽게도 정답을 알려주는 에러에 걸려들었습니다
평소엔 에러가 달갑지 않지만 이럴 땐 정말 반가웠습니다
다행스럽게도 Colab환경에 문제가 있었던 것이고 오늘의 에러를 통해 코랩과 주피터 노트북 환경또한 완벽하게
호환되지 않는 것도 알게 되었던 계기가 되었습니다
# 코랩이 따로 만든 imshow 기능 사용해보기
from google.colab.patches import cv2_imshow
cv2_imshow((face_copy))
드디어 정상 작동을 확인했습니다(이상하게 삽질 할수록 배우는게 더 많은 듯 하네요)
그리고 맞왜틀을 외치고 앉아있는 것 보다 틀린 부분에 대한 빠른 검증을 해나가며 나아가는 것이
중요하다는 것을 다시 한번 깨달은 부분이었습니다 다시 Task 진행~
landmark 30번이 코의 점 좌표입니다
x값은 변함이 필요가 없지만 y값의 경우 왕관이 머리위에 씌워져야 하므로 -를 통해 임의로 위치를 올려줍니다
for dlib_rect, landmark in zip(dlib_rects,list_landmarks):
    print("Nose index:", landmark[30]) # nose index
    x = landmark[30][0]
    y = landmark[30][1] - dlib_rect.height() // 2
    w = h = dlib_rect.width()
    # position of nose
    print ('(x,y) : (%d,%d)'%(x,y))
    # pic rate
    print ('(w,h) : (%d,%d)'%(w,h))

# Nose index: (1216, 2152)
(x,y) : (1216,1673)
(w,h) : (960,960)
Add Sticker
이미지를 로드하고, 원본 사진에 맞게 리사이즈 합니다
# crown image load
sticker_path = '/content/E-8-3.png'
img_sticker = cv2.imread(sticker_path)
img_sticker = cv2.resize(img_sticker, (w,h))
print(img_sticker.shape)
# (960, 960, 3)
width와 height의 값에 따라 x와 y의 값에 변화를 줍니다
refined_x = x - w // 2
refined_y = y - h
print ('(x,y) : (%d,%d)'%(refined_x, refined_y))
# (x,y) : (736,713)
스티커의 범위가 이미지를 초과하게되면 에러가 발생하게 됩니다 예외 처리
if refined_x < 0 :
    img_sticker = img_sticker[:, -refined_x:]
    refined_x = 0
if refined_y < 0:
    img_sticker = img_sticker[-refined_y:, :]
    refined_y = 0

print('(x,y) : (%d,%d)'%(refined_x, refined_y))
# (x,y) : (736,713)
아래 코드가 참 이해가 안되었었는데 뜻밖의 에러를 겪으면서 이해도가 많이 상승했습니다
sticker_area = face_copy[refined_y:refined_y+img_sticker.shape[0], refined_x:refined_x+img_sticker.shape[1]]
face_copy[refined_y:refined_y+img_sticker.shape[0], refined_x:refined_x+img_sticker.shape[1]] = \
    np.where(img_sticker==0,sticker_area,img_sticker).astype(np.uint8)
sticker_area가 필요한 이유는 원본과 합성하고자 하는 사진의 size가 다르기 때문입니다
따라서 원본의 배경중에서 스티커의 해상도만큼 잘라낸 상태에서 스티커 사진 값으로 대체하여 줍니다
plt.imshow(cv2.cvtColor(face_copy, cv2.COLOR_BGR2RGB))
plt.show()
그런데 조금 마음에 안듭니다
왕관은 머리에 써야하는데 눈썹 위에서 쓰고 있습니다..
하드코딩의 느낌이 없지 않아 있지만,, 계산 수식의 변경을 통해서 저에게 맞춤으로 만들어 봅니다
for dlib_rect, landmark in zip(dlib_rects,list_landmarks):
    print("Nose index:", landmark[30]) # nose index
    x = landmark[30][0]
    y = landmark[30][1] - dlib_rect.height() // 1.05 <-- 수정한 값
    w = h = dlib_rect.width()
    # position of nose
    print ('(x,y) : (%d,%d)'%(x,y))
    # pic rate
    print ('(w,h) : (%d,%d)'%(w,h))
이외의 코드는 동일합니다
cv2_imshow((face_origin))
다음 Task 진행을 위해 시간을 더 투자할 순 없었지만 시간이 더 있다면 option으로 수동선택 하는 기능과
머신러닝으로 머리까지 알아서 인식하는 알고리즘이 있으면 좋겠다는 여운을 남기고 다음으로 돌아섭니다
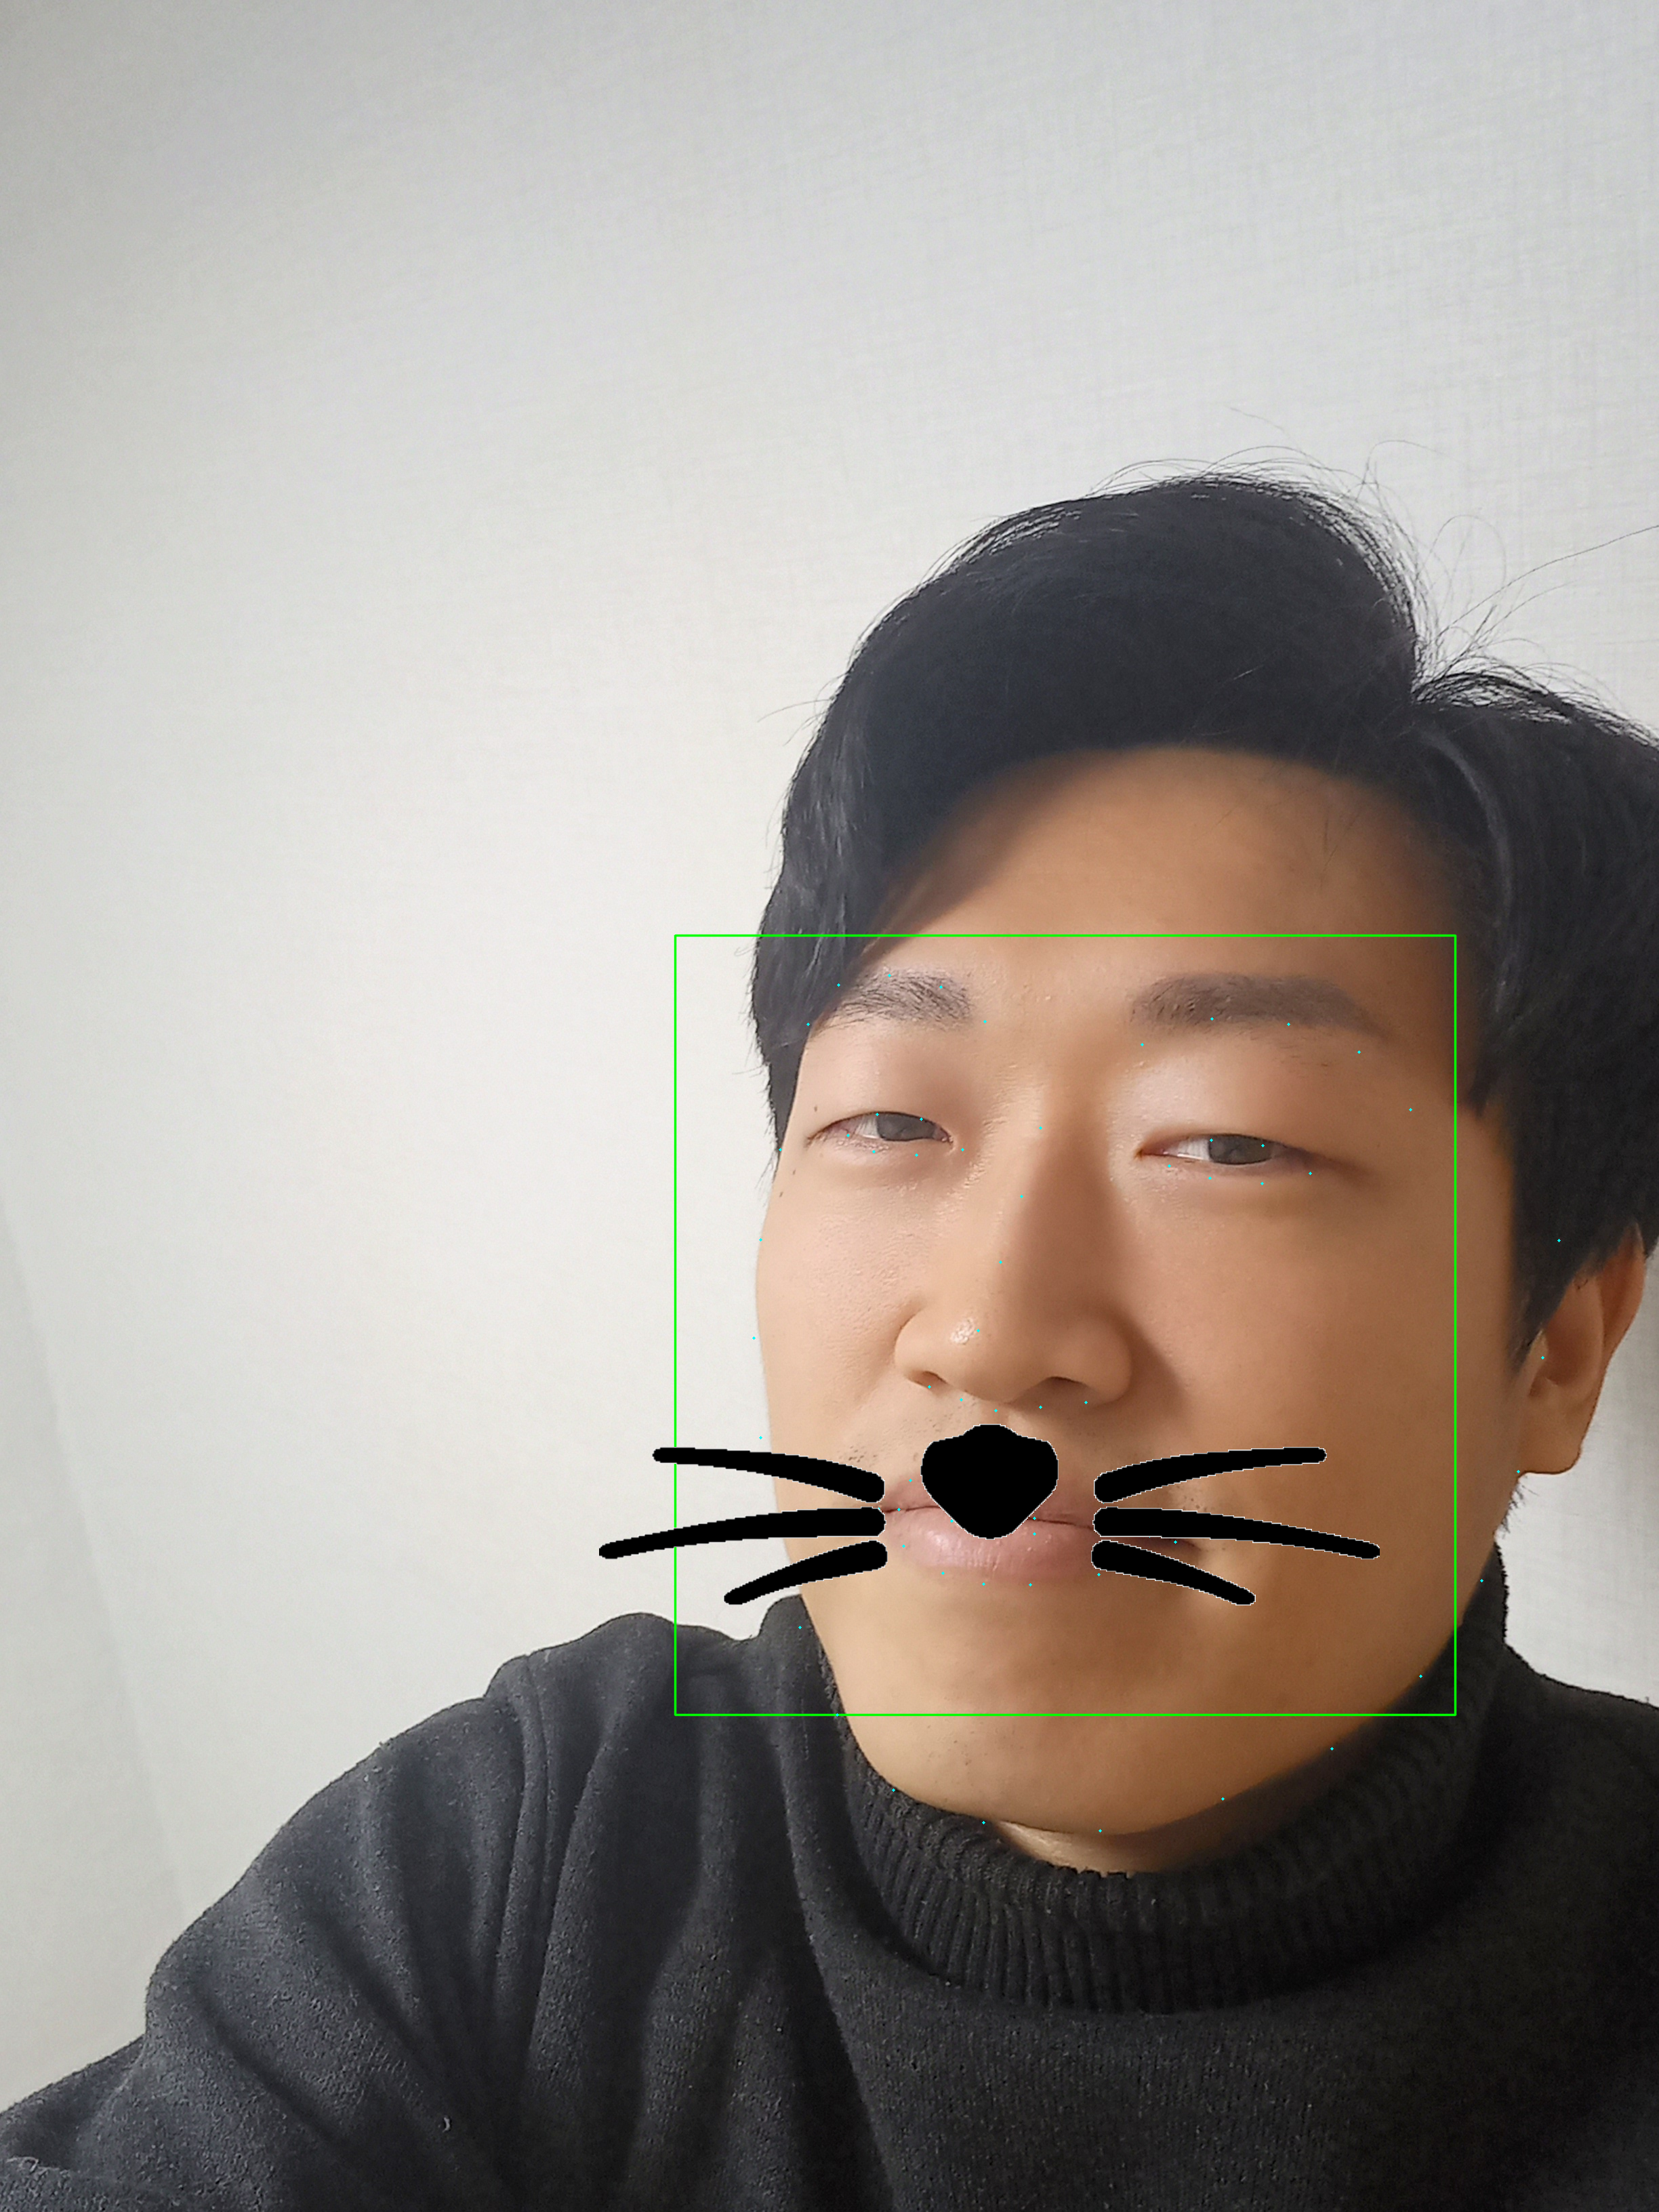
이번에는 고양이 수염을 붙여보는건데.. 저는 이미 셀카로 했기 때문에 과정 자체는 거의 비슷했습니다
# check cat whisker image
cat_whisker_path = '/content/cat_whiskers.png'
cat_whisker_origin = cv2.imread(cat_whisker_path)
cat_whisker_copy = cat_whisker_origin.copy()
cat_whisker_rgb = cv2.cvtColor(cat_whisker_copy, cv2.COLOR_BGR2RGB)
plt.imshow(cat_whisker_rgb)
plt.show()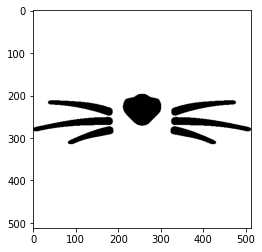
Add Sticker
기존 코드와 동일한데 조금의 변화가 있었습니다
고양이 수염이다보니 아무래도 입쪽에 있어야 한다는 생각에
중심점을 인중으로 변화했으며, 비율에 따라 y값을 +해서 아래로 향하게 했습니다
for dlib_rect, landmark in zip(dlib_rects,list_landmarks):
    print("lips index:", landmark[62]) # lips index
    x = landmark[62][0]
    y = landmark[62][1] + dlib_rect.height() // 2 <--- 수정부분
    w = h = dlib_rect.width()
    # position of nose
    print ('(x,y) : (%d,%d)'%(x,y))
    # pic rate
    print ('(w,h) : (%d,%d)'%(w,h))
#lips index: (1209, 2325)
(x,y) : (1209,2900)
(w,h) : (1151,1151)
다음 예제에서 활용을 추천하는 cv2.addWeighted 기능을 사용했더니
cv2_imshow(cv2.addWeighted(sticker_area, 1, cat_sticker, 0.2, 0))
둘다 희미해져만 갑니다..
또다시 찾아오는 에러없는 에러의 시간
의외로 해답은 먼곳에 있지 않았습니다
face_show_rgb[refined_y:refined_y+cat_sticker.shape[0], refined_x:refined_x+cat_sticker.shape[1]] = \
    np.where(cat_sticker==255,sticker_area,cat_sticker).astype(np.uint8)

# np.where(cat_sticker==255) 0에서 255로 변경
np.where(cat_sticker==255, sticker_area, cat_sticker) 해석해보면 cat_sticker에서 값이 255(흰색)인 부분을 찾아서
sticker_area로 변경하라는 뜻입니다
팀원 분 덕에 알게되었는데 제가 코드가 일단 작동한다는 이유로 깊게 파고들지 않았던 부분으로
np.where함수를 공식문서를 통해서 다시 알아보고 동작원리를 알게된 부분이었습니다
아래는 다른 각도의 사진으로 시도
눈썹인식에서 상당히 아쉬움이 남습니다 눈썹문신까지 한건데...

확실히 고개를 돌릴수록 어색함이 생깁니다
각도가 틀어짐에 대한 계산과 함께 보여지는 것에 대한 바뀜도 생기면 좋을 듯 합니다
앙코르
앙코르로 팀원 분 중에 트와이스의 사나를 좋아하는 분이 계시다고 해서 도전해봤습니다
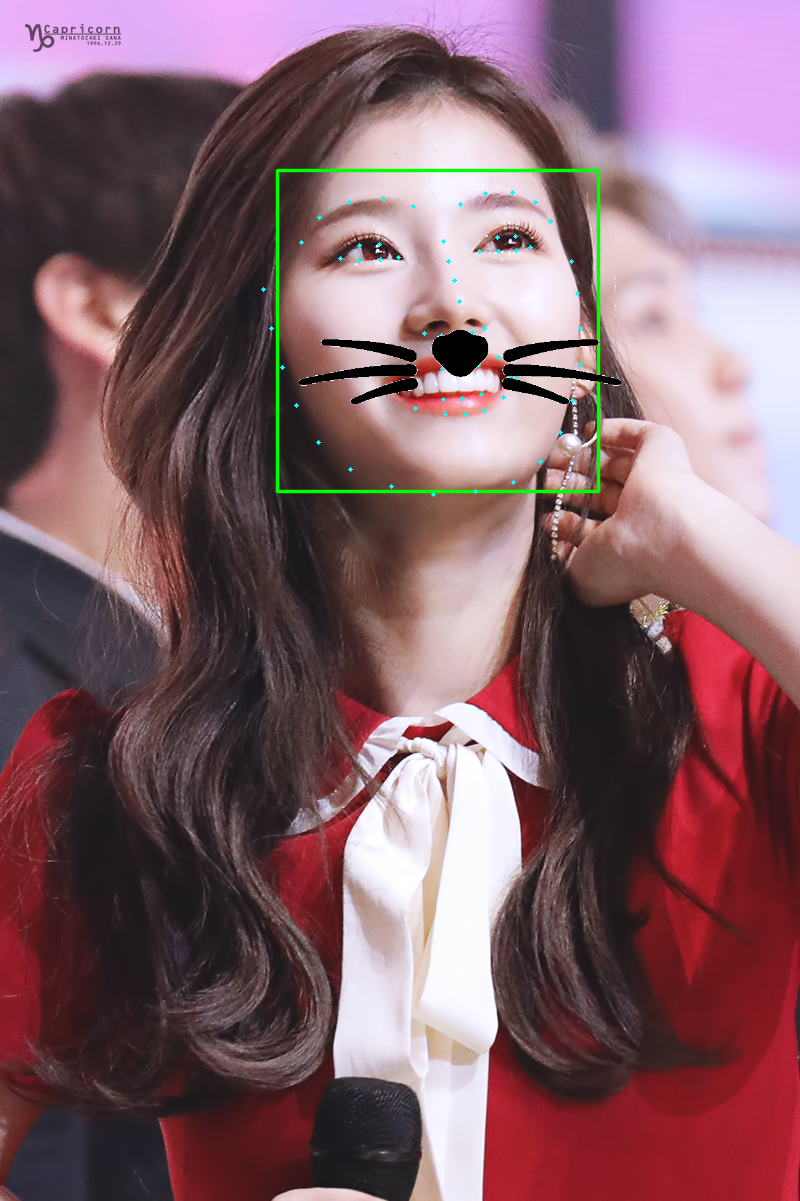
코에다가 하는게 귀여울뻔 했네요 인중...
그래도 눈썹까지 완벽하게 인식하는거 보니 역시 연예인 얼굴은 이목구비가 인식이 잘되게끔 되어있나봅니다
즐거운 Task 진행이었습니다~!
'23년 이전 글 > 모두의연구소 아이펠' 카테고리의 다른 글
| - 14일차 - 야너두 작사가 될 수 있어 (3) | 2022.01.13 |
|---|---|
| - 13일차 - Cat vs Dog classification (0) | 2022.01.12 |
| -11일차- Everything in Python is Object (0) | 2022.01.10 |
| -10일차- Machine Learning과 Scikit-Learn (0) | 2022.01.07 |
| -9일차- Machine Learning Classification Task (0) | 2022.01.06 |